

I hope you've all had a great weekend! I am sure feeling grateful for the beautiful weather we had here in Atlanta yesterday, because it is raining & yucky today. But, I am using this post-church-rainy-time to put together a post to answer bunches of questions I've gotten lately about how to paint, stain & refinish.
But, first, what's a good post without a dramatic before & after?!
My neighbor picked up this adorable piece for me... have I mentioned she is my 'scout' and comes home with the most fabulous things?
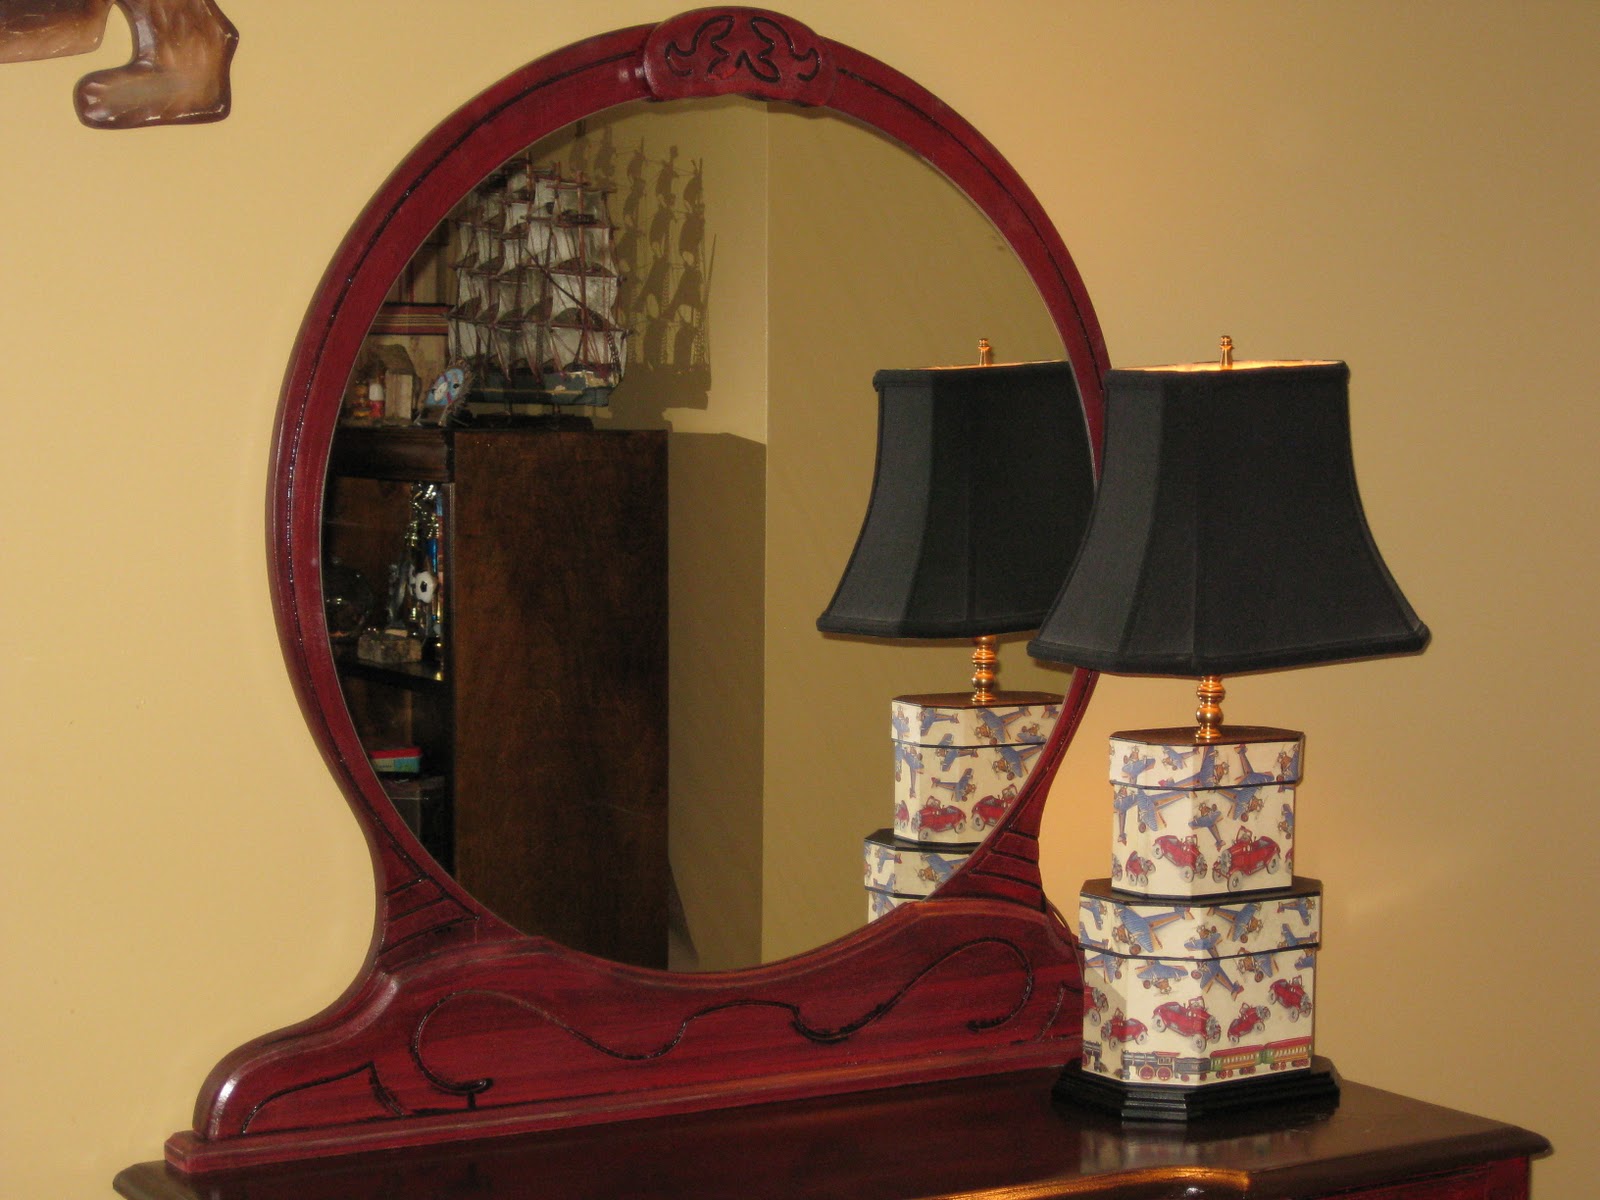
Here is the 'after'
Edited to add... I've already had 2 people ask where I got the lamp :) It is from Bonnie Pryor & Co., she is frequently at Scott's Antique Market in Atlanta but her website is here. She has tons of fabulous things!


All primed & ready to go. Planning to strip & stain the top, so I left that alone.

Painted red. As always, if you're going to glaze something, paint it a much brighter color than you want it to be when you're done. This takes a while to get used to. That red color is a bit alarming!


Glazing/Distressing in process. I got lots of dark walnut stain in the cracks & crevices, and used a tobacco glaze on the flat surfaces. I really wanted the details to stand out.


Ready to stain the top. I went with a 'hickory' gel stain. I don't really care for gel stains, but I had this one & the color was right. So I went with it. Also, I almost always strip/sand before I paint. I'm sure there was a reason that I did it this way, but now I can't remember what it was.

Stained & satin finish is drying.

All done! Love it!


So, I've been getting lots of comments & even more emails with questions about tips & techniques for painting, staining & refinishing. I'll do my best to answer those questions here, but please keep in mind that I am NOT an expert. These are just the things that have worked for me.
If you want a great tutorial from someone who has much more experience than me, go to Alter'd and purchase her amazing e-book!
To start:
*When I bring an item home, I start by using clorox wipes or clorox clean up to clean it really really well. I am a little too obsessed with the current bedbug thing (gross gross gross) so I try to really, really get things clean before I start touching them. Also, they stay in my garage (in quarantine!) for a couple of weeks at least before coming in the house.
*For drawers, nooks & crannies, I use TSP to wipe down the surfaces. It gets lots of grime off.
*Remove all hardware, hinges, etc. Lay everything out, and bag up all of your hardware together so that no pieces get lost (sounds obvious, but you'd be surprised how many times I think 'I'll do that later' and then can't find a piece!)
*SAND. I use both an orbital sander and sanding blocks. I also have a sander with a little tip on the top of it to get into tight corners (not sure what its called). If you're painting, you don't have to sand the surface all the way through, you just want to rough up the surface so that the paint has something to grab on to.
*Fill any holes that you aren't going to be using, or fill any damaged spots. Use a sandable (and stainable, if that applies to your project) wood filler. Fill the area, and smooth over with your finger. Have a wet cloth handy for your yucky fingers. After the product dries, sand it so that the filler is even with the wood.
*After you've sanded, wipe the piece down really well to remove all the dust. If you're outside, a blower works great for this :) But use a damp cloth also to make sure you get all the tiny bits of dust off.
If you're painting:
*PRIME. I almost always use a spray primer. It is more expensive (and admittedly not super for the environment), but I think it coats a lot better than brush-on. My favorite to use is the Kilz Complete, with the brown label (the regular kilz with the red label has a tendency to get gritty). Spray on a light, even coat. There will be places where you can see through the primer, but don't worry about that. Let it dry, and then lightly sand it. Then apply another light coat & you'll see a nice even surface appear. Lightly sand again. This stuff dries fast, so it won't take as long as you think.
When I use a brush-on primer (on flat surfaces) I always use the foam brushes from the hardware store. I use the same brand, Kilz Complete, just in a gallon container. Just a tip- if you put your foam brush in a ziplock bag, the paint won't dry up, and you can reuse the brush again for that same paint.
*Paint. There are, in my opinion, three ways to paint. Spray paint, a paint sprayer, and by hand.
**The easiest & most fool-proof if you are just doing a small piece is spray paint. Rustoleum's Painter's Touch is by far the best spray I've ever used. Their Heirloom White is a home-run every time. It is the perfect barely-off-white. All of their paints (used over primer) cover in one coat. I love their black, their light blue, pink, khaki and gray. Love them. For spray paint, just make sure you aren't closer than a foot or so to the piece and do light coats rather than one heavy coat. You can go right behind and re-coat, but if you coat too heavily the first time, you will have drips that are hard to remove later. *A note about finding the right brand of spray paint: I couldn't find painter's touch anywhere locally , but the Rustoleum website indicated that Ace Hardware carried it. So I went in & talked to them. Now, they order it for me by the case when I need it, and I don't have to pay for shipping since it goes to the store. How great is that?
**Another great way to paint is to use a paint sprayer. You don't have to have a fancy sprayer to paint, but that sure is nice :) Spraying will get you a nice, even, smooth finish. I have a gravity-fed sprayer that is powered by our (read: my husband's) super-duper compressor. I'm not going to share what brand it is because I am not really in love with it. I have heard that the smaller sprayers (all in one units, like the Wagner sprayer that sells for about $75 at HD or Lowe's) work just fine too. Just consider how long it takes to clean up your mess with a sprayer (especially if you use oil-based paint, which I usually don't).
One option that I haven't read much about is for smaller jobs that you want to spray, but without all the mess. This is a product called the Preval Sprayer. It is a glass jar with an aerosol can attached to the top. You dilute your paint (for latex, just use water, and for oil-based, use a paint thinning product), add it to the jar, screw the lid on and spray away! I think this is genius, and I have used these on a number of occasions when I want a custom color on a small job (especially for a small piece that has spindles or really intricate trim). It produces a great finish and the total cost of the unit is about $6 (and you can buy replacement aerosol cans for about $4). How great is that? They sell these at HD, and I am sure at other places too. Of course, Amazon always has them.
**Finally, the last way (again, in my opinion) to paint is the old-fashioned way... by hand. As I've said, I don't paint with a brush all that much, but when I do, I use a good Purdy brush. They are expensive, but worth every penny. You just have to be patient and be willing to put on multiple thin coats, letting the paint really dry between coats. I like how things look with a little brush-stroke showing on them, but you can also add a product (I think it's called Flotrol?) to lessen the look of brush-strokes if you wish.
**When painting, I always do a light sanding between coats. You can forgive a lot of oops's doing this! (And, no, grammar police... oops's is not a word, but I'll bet you knew what I meant when I used it!)
If you're Refinishing a Piece:
*Follow the directions under "to start". Put on some GLOVES and don't take them off till you're done!
*Decide how you want to remove the current finish. There are two ways to do this: using stripper, or sanding.
*If the wood is fragile or extremely old, or if the finish seems very thick, I think stripper is the way to go. I really prefer to use the less-chemical-ish Citristrip product. The smell is pleasant and it doesn't seem as toxic as a more traditional stripper. However, it doesn't really do as good a job as a true stripper. I often find that I need to do several applications, and wait a couple of hours for each application to set in before removing the finish. With old-school stripper, you put on one coat and you're done. But it is yucky stuff~ in fact, I don't think I've ever used a traditional stripper without getting a migraine. So take that for what it's worth! After the stripper has lifted the finish off the piece, you'll need a scraper (plastic, so as not to scar the wood with metal) to scrape all of the goo off into a container. After you get it all off, you'll need to sand.
*If the finish isn't too thick or the piece is really sturdy, you can just sand the finish right off. Use an orbital sander (so that you don't have to worry about going with the grain) and a heavy grit sandpaper (I start with 60, then move to finer & finer grits). When the finish is gone, sand by hand with a sanding sponge all over.
And, please, go outside to do either stripping or sanding! And wear a mask!!
Next, you will want to add a new finish...
*I always start with wood conditioner. (Do NOT use a wood conditioner if you're going to paint!) It preps the wood to accept the stain, and I think the finish goes on better with it. Follow the directions on the can (you can buy this with the stain products) and wipe it on, then wipe off the excess. Put your finish on within 30 minutes of this application (or whatever the brand you are using says!)
*Choose your stain color. This is totally a personal preference. The one piece of advice I will offer (and I NEVER take this advice myself, so do with it what you wish!) is to consider how scuffs & scratches will show. The darker the stain, the more the scuffs & scratches will show. I am a dark-walnut gal all the way, so obviously I don't let this affect me! I prefer Minwax products, and I prefer the stains without the finish poly coat in them... they are more forgiving, in my opinion.
*Using a foam brush, brush on your stain with the direction of the grain. Coat the entire surface you are working on all at once (for example, the entire top... then finish & move to the sides). After the stain has 'set' for about 10 minutes, take a lint-free cloth and remove whatever stain is still sitting on the wood. What is left is the color that coat is going to leave you with.
*If you want the color to be darker/richer, wait for the first coat to DRY completely and then add another coat, following the directions for the first coat. If you don't wipe off the excess, the finish will look gloppy and could be uneven.
*After you are happy with the color and the stain is completely dry, you are ready for a finish coat. There are a number of products to choose from (again, in the stain section), I prefer the Minwax Polyurethane. You can choose satin, semi-gloss or gloss. I usually go for the satin. Again, using a foam brush, brush on a thin & even coat of poly. Let is DRY.
*When the coat is dry, give it a light sanding with a fine grit sanding block/sponge. Brush off the dust, and give it another coat. Repeat as needed. For a piece like a chair seat, I would put as many as 7-8 thin coats. For the sides of a dresser, I might only do 3. Up to you.
To distress:
*There is no right or wrong way to do this, so I'll just share how I do it! And please remember.... what's the worst that can happen with distressing? You can always start over if you're unhappy with the results, so don't ever be afraid to try something.
*After your finish is done & totally dry (but before you poly), it is time to distress. I always do this by hand, as I feel like it gives me more control.
*Take your sandpaper/sanding sponge and drag it along the edges, trim or anywhere you'd like to show some age. As much or as little as you'd like. I usually use an 80 or 100 grit sandpaper for distressing. Some people might prefer a lighter touch, though.
*Decide how dark you want your distressing to be. Glaze is very forgiving (I like the Ralph Lauren tintable glaze that they used to sell at HD, but now I get it online.) A little goes a long way, and you can always wipe it off with a damp cloth if you're not happy with the results. I use the tea-stained glaze for a lighter look, and the tobacco glaze for a darker look. Rub it along your sanded parts, or brush it all over the piece. Once it is dry, sand lightly, and repeat until you get the look you're going for. Glaze can really change the look of a color, so you can create all sorts of finishes.
*You can also buy tubs of untinted glaze (I hear Valspar makes a good one) and tint it yourself in small batches, with paint. This opens up a whole world of possibilities! You can glaze a light color with a white glaze, for a beachy look. Or add red into a black finish.
*Another way to distress after sanding is with stain. It is less forgiving (you really have to use laquer thinner to dilute the look once it's on, and that is strong stuff!) so you have to be a little more brave to take this route. But the final look is gorgeous.
If you're painting & staining on the same piece:
*I recommend removing the finish on the part you will be staining first. Then, cover the bare wood you will be staining with butcher paper and painter's tape. Make sure to get a good seal with the painters tape on any edges or corners so that the wood is safe from paint (unless you just want to start over, that is!) Then when you are finished painting, uncover the wood & start the staining process.
THE END! Moral of the story: You CAN do this!
PHEW, y'all!! Could this post be any longer?! I am sure there are things I've missed, despite the fact that I've been working on this on & off all day long (and referencing back to emails & facebook messages of tutorials I've already sent people). Will you let me know if you have additional questions, or if I didn't explain something fully? I'll go back & edit to add the additional information!
Thanks so much (if you're still reading... you may be asleep by now-ha!)
Kathie
linking to:
Somewhat Simple's Strut Your Stuff Thursday
Funky Junk Interiors
Blue Cricket Design's Show & Tell Wednesday
Domestically Speaking's Power of Paint Party
Between Naps on the Porch: Metamorphosis Monday
Perfectly Imperfect's Style Feature Saturday
Keeping It Simple's Motivate me Monday
Debbiedoo's Before & After Party

Phew is right! :) Thank you so much for all your advice!! It really helps! Your piece turned out so pretty! I love the glaze color!
ReplyDeleteNo I sure did not fall asleep -Loved reading how you achieve such beautiful pieces of furniture. I never heard of the little 6 dollar sprayer -I'm going to check HD and buy one -sounds nice to have. I really enjoy browsing your blog
ReplyDeleteThanks for all the advice. I've been thinking about buying that Wagner sprayer.... I don't think I need anything more powerful than that. What red did you use? I got a SW red this weekend for my son's desk, and it was HORRID!
ReplyDeleteThat looks fabulous! Thanks for sharing.
ReplyDeleteBrittany
http://www.prettyhandygirl.com
Great job! I can't believe you got such a beautiful piece for free! Yahoo!
ReplyDeleteThat was great! Good job - nice tutorial. And your pieces are gorgeous! you know what you are doing!
ReplyDeleteLOVE LOVE LOVE this piece and love your blog!!!
ReplyDelete& thx for the tips...I'm saving it as a document on my computer =)
What a cute desk! Love the red!
ReplyDeleteI ambookmarking this post for future reference. Thanks for sharing
This is beautiful!...and thanks for all the tips on stripping, painting and distressing very helpful when not wanting to invent the wheel.
ReplyDeleteWOW that is one fine tutorial here. I am like you with the clorox wipes on these pieces YUK!!~ That turned out so pretty, I love the stain.
ReplyDeleteMy grandmother had a vanity almost IDENTICAL to that! It turned out great :) Hopping over from BCD.
ReplyDelete~Lori @ Paisley Passions
Paisley Passions Linky Party Thrilling Thursdays
i think you have done a great job in restoring this chest and mirror set, it looks so lovely and i cannot imagine it in a bad condition, very beautiful for any home
ReplyDeleteAboutCabinets Blog
This was a great tutorial! Really helped me alot. Thanks!
ReplyDeleteA little late stopping by from debbiedoos! Very good instructions/tutorial. The desk turned out just awesome!
ReplyDelete